
My journey with container gardening bell peppers began in a small urban apartment, where space was limited but my desire to grow fresh produce was always there. Among all the plants I’ve nurtured, bell peppers hold a special place in my heart. There’s something magical about watching these nice-looking plants thrive in even the tiniest of spaces.
Growing bell peppers in containers is simpler than you might think. The key is selecting the right planter—one that offers proper drainage and enough room for the roots to grow. I’ve found that the right container can make all the difference in the health and productivity of your plants.
One of the joys of growing peppers is the many colors and flavors you can bring to your garden—and your kitchen. From sweet, crunchy snacks to spicy stuff for your favorite recipes, each type of bell pepper offers something unique.
Whether you’re tending to a small balcony or a cozy patio, container gardening is a perfect way to enjoy fresh, homegrown produce. In this guide, I’ll share my personal tips and tricks for growing thriving bell peppers in containers, some links may be affiliate links. I enjoy helping you make the most of your space and savor the rewards of your labor – we all get back what we put in.
Getting Started with Supplies and Containers
Starting your pepper plant journey begins with the right tools and a well-chosen container. I’ve learned that a spacious, well-draining container is key to healthy growth. A 12-inch pot or fabric grow bags are excellent choices for supporting robust root development and maximizing fruit production.
Choosing the Right Container for Your Peppers
When selecting a container, size matters. A 12-inch pot or larger is ideal, as it provides enough room for the roots to expand. Fabric grow bags are another great option, offering excellent drainage and aeration. Terra-cotta pots are also a good choice, as they allow for proper airflow and moisture release.
Essential Gardening Supplies and Tools
To ensure a successful start, gather the right supplies. High-quality seed is crucial, as it directly impacts the health and productivity of your plants. Invest in a good watering can, stakes for support, and a well-draining potting mix. These tools will help you establish a strong foundation for your pepper plants.
One tip I’ve learned is to start seeds indoors early in the year for a head start. Use a seed tray or small pots, and keep the soil warm until germination. This method ensures your seedlings are robust before transplanting them into larger containers.
Remember, the quality of your seed and the care you provide will significantly influence the outcome. With the right supplies and a little patience, you’ll be on your way to growing thriving pepper plants in no time.
Container Gardening Bell Peppers: From Seed to Transplant
Starting your pepper plant journey is an exciting process that begins indoors and transitions smoothly outdoors. This section will guide you through the steps of starting seeds, transplanting, and hardening off your seedlings for optimal growth.
Starting Seeds Indoors for a Head Start
The journey begins with selecting high-quality seeds and planting them in small pots or seed trays. Use a well-draining potting mix and keep the soil warm to encourage germination. Grow lights can be incredibly helpful in providing the necessary light for seedlings.
Water management is crucial. Keep the soil moist but not soggy. Once seedlings emerge, ensure they get enough light to grow strong and healthy.
| Factor | Indoor Growing | Outdoor Growing |
|---|---|---|
| Light | Grow lights needed | Natural sunlight |
| Temperature | Warmth required | Seasonal adjustment |
| Watering | Controlled moisture | Regular watering |
Container Gardening Bell Peppers – Transplanting Techniques and Tips
When seedlings have 2-3 sets of leaves, it’s time to transplant them into larger pots. Harden off seedlings by gradually exposing them to outdoor conditions over 7-10 days to prevent shock.
Use fertilizer during the growing season to support healthy growth and fruiting. Different pepper varieties may have specific needs, so adjust care accordingly.

Hardening Off Your Seedlings for Outdoor Success
Hardening off is essential to acclimate seedlings to outdoor conditions. Start with partial shade and gradually increase exposure to full sun and wind. This process reduces transplant shock and sets your plants up for success.
Optimizing Sunlight, Watering, and Fertilizer
Optimizing sunlight, watering, and fertilizer is crucial for maximizing the growth and productivity of your pepper plants. By balancing these elements, you can create an environment that fosters healthy growth and abundant fruit production while keeping pests like aphids at bay.
Managing Water and Nutrient Levels
Consistent watering is essential for container gardening bell peppers. I recommend watering your plants in the morning to allow the potting mix to absorb the moisture without overnight evaporation. Use a well-draining potting mix to prevent waterlogged soil, which can lead to root rot and attract pests.
Fertilization plays a key role in promoting healthy growth. I use a balanced fertilizer during the growing season, applying it every two weeks. Overfertilization can harm your plants, so always follow the manufacturer’s instructions. Keep an eye out for signs of nutrient deficiency, such as yellowing leaves, and adjust your fertilization schedule accordingly.
| Factor | Indoor Growing | Outdoor Growing |
|---|---|---|
| Light | Grow lights needed | Natural sunlight |
| Temperature | Warmth required | Seasonal adjustment |
| Watering | Controlled moisture | Regular watering |
Maximizing Sunlight Exposure for Fruit Production
To grow thriving pepper plants, ensure they receive adequate sunlight. Place your containers in a spot that gets at least 6 hours of direct sunlight daily. South-facing locations are ideal for maximizing sun exposure.
Proper positioning can significantly impact fruit production. Avoid shading your plants, as this can reduce their ability to photosynthesize and produce fruit. If possible, rotate your containers to ensure even light distribution.
By optimizing sunlight, watering, and fertilizer, you can create a thriving environment for your pepper plants. Regular monitoring and adjustments will help prevent pest issues and ensure a bountiful harvest. Integrate these practices into your daily routine for the best results.
Troubleshooting Common Pepper Plant Issues
As your pepper plants grow, you may encounter some common challenges that can affect their health and productivity. Being able to identify and address these issues promptly is key to ensuring a successful harvest.
Identifying and Managing Pests and Diseases
One of the most common issues I’ve faced is pests like aphids and spider mites. These tiny creatures can cause yellowing leaves and stunted growth. To manage them, I recommend introducing natural predators or using neem oil. Regularly inspecting your plants and maintaining clean soil can help prevent infestations.
Diseases can also affect your pepper plants, especially if the soil is poorly drained. Fungal infections often appear as white patches on the leaves or stems. To combat this, ensure your soil has good drainage and avoid overwatering. Proper air circulation around your plants can also help prevent the spread of disease.
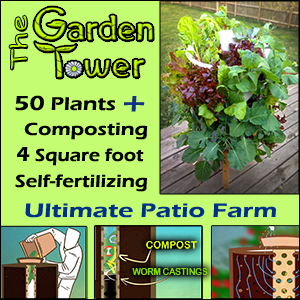
🌱 Grow 50 Plants in 4 Sq Ft
Tired of juggling pots for your bell peppers? Imagine harvesting armfuls of crisp, juicy peppers—plus herbs, flowers, and veggies—from one sleek, space-saving tower. Check out The Garden Tower 2 – It isn’t just a planter. It’s a self-feeding garden that turns kitchen scraps into thriving plants, automatically.
Correcting Overwatering and Nutrient Imbalances
Overwatering is a common mistake that can lead to root rot and nutrient deficiencies. If you notice your plants wilting or the leaves turning yellow, it may be a sign of too much water. Allow the soil to dry slightly between waterings, and consider repotting with fresh, well-draining soil if the problem persists.
Nutrient imbalances can also impact your plant’s health. If your leaves are turning yellow or your stems are weak, it might be a sign of lacking essential nutrients. Use a balanced fertilizer during the growing season, but avoid overfertilizing, as this can cause more harm than good. Regular soil testing can help you identify any deficiencies and adjust your fertilization schedule accordingly.

By staying vigilant and addressing these common issues early, you can help your pepper plants thrive and enjoy a bountiful harvest. Remember, consistent care and attention to detail are key to overcoming any challenges your plants may face.
Maximizing Harvest and Using Your Fresh Peppers
Harvesting your peppers is one of the most rewarding moments in the growing process. To ensure you get the best flavor and texture, it’s important to know exactly when to pick your peppers.
Determining the Ideal Harvest Time
The perfect time to harvest is when your peppers reach their full color and size. For sweet varieties, wait until they turn from green to vibrant shades of red, orange, or yellow. Spicy peppers are typically ready when they reach their desired color, which can vary by variety.
Most peppers take about 10 to 12 weeks to mature from sowing the seed indoors. If the process seems slow, ensure your plants are getting enough sunlight—aim for at least 6 hours of direct sun daily. Avoid overwatering, as this can delay ripening and increase the risk of disease.
Creative Culinary Uses for Your Bell Peppers
Contain gardening bell peppers can even have some side benefits. Fresh peppers are incredibly versatile. Slice them thin for fresh salsa, stuff them with your favorite filling, or roast them for a sweet, smoky flavor. They also add a crunchy texture to salads and sandwiches. You can even start a small side hustle.
For next season, consider saving seeds from your healthiest plants. Store them in a cool, dry place indoors. When storing freshly picked peppers, keep them in the refrigerator at a consistent temperature to maintain freshness for up to a week.
Proper handling and storage not only prevent disease but also preserve the nutritional benefits of your peppers. Enjoy your harvest and get creative in the kitchen!
Container Gardening Bell Peppers – Wrapping Up My Pepper Garden Journey
Reflecting on my journey of nurturing vibrant peppers, I realize each step, from selecting the right planter to harvesting, has been a testament to patience and care. Balancing nutrients and temperature has been key to fostering healthy root development, ensuring my plants thrive even on a small balcony.
The transformation from green to a riot of colors signals a successful harvest, a direct result of consistent daily attention. This journey teaches us that even minor adjustments can lead to significant improvements in our pepper grow outcomes.
Embrace the joy of growing your own peppers, no matter the space. Stay committed to learning and experimenting—every adjustment brings you closer to a bountiful harvest. Happy growing!
🌱 Grow 50 Plants in One Mega Planter…

Do you wish you had more garden space? Imagine harvesting armfuls of crisp, juicy peppers—plus herbs, flowers, and veggies—from one sleek, space-saving tower. Check out The Garden Tower 2 – It isn’t just a planter. It’s a self-feeding garden that turns kitchen scraps into thriving plants, automatically.
Quick FAQ
How much sunlight do pepper plants need?
Pepper plants thrive in full sun, requiring at least 6 hours of direct sunlight daily. Choose a sunny spot for your container to ensure healthy growth and fruit production.
Container Gardening Bell Peppers – What is the best container size for growing peppers?
A container with a minimum depth of 12 inches is ideal for pepper plants. It provides enough room for the roots to grow and supports a sturdy stem.
How often should I water my pepper plants?
Water your pepper plants when the top 1-2 inches of soil feel dry to the touch. Avoid overwatering, as it can lead to root issues and reduce fruit production.
How do I protect my pepper plants from pests like aphids?
Regularly inspect your plants and use neem oil or insecticidal soap to control aphids. Introducing natural predators like ladybugs can also help keep pests at bay.
Container Gardening Bell Peppers – What fertilizer is best for growing peppers?
Use a balanced fertilizer with a ratio of 10-10-10 (nitrogen-phosphorus-potassium). Apply it every 2 weeks during the growing season to promote healthy growth and fruit development.
When is the right time to harvest bell peppers?
Container gardening bell peppers with the best results depends on harvesting them when they reach their full color and size. For sweet peppers, wait until they turn from green to your desired color, usually within 70-90 days of planting.
Can I grow peppers on my balcony?
Absolutely! Peppers grow well in containers on balconies. Ensure your container has drainage holes, and place it in a sunny spot with at least 6 hours of sunlight daily.
How do I prevent my pepper plants from getting diseases?
Keep your plants healthy by providing good air circulation, avoiding overhead watering, and removing any infected leaves immediately. Regularly inspecting your plants can help catch issues early.
Can I start pepper seeds indoors?
Yes, starting seeds indoors 8-10 weeks before the last frost date gives your pepper plants a strong head start. Use seed starting mix and keep the soil warm (around 75-85°F) for optimal germination.
How do I know if my pepper plant is getting enough nutrients?
Look for healthy green leaves and steady fruit production. If your plant is struggling, consider testing your soil and adjusting your fertilizer application as needed.

Pingback: Container Gardening Squash - Gardening Hacks